How To Organize A Small Bathroom Without Drilling Tiles: The Ultimate Renter's Guide
Overview
This comprehensive guide explains how to organize a small bathroom effectively without drilling holes into ceramic tiles. Aimed primarily at renters and homeowners looking to avoid tile damage, the article covers why traditional suction cups fail, the science behind modern acrylic adhesives, and a step-by-step process for securely mounting bathroom shelves and soap holders. It features practical tips on utilizing vertical space, product recommendations like the Aluminium Wall Rack and Self-Adhesive Soap Holders, and expert advice on safely removing adhesives using a hairdryer without leaving residue.
The Renter's Bathroom Dilemma
The sound of a power drill cracking a brand-new ceramic tile is a homeowner’s worst nightmare. If you live in a rented apartment in cities like Bengaluru, Mumbai, or Delhi, that same sound represents your security deposit vanishing into thin air.
Indian bathrooms present a unique set of challenges. They are often compact, prone to high humidity during monsoons, and subjected to daily splashing from bucket baths or showers. When space is tight, bottles pile up on the window sills, soap bars melt into mush on the sink edge, and cleaning the floor becomes an obstacle course. You know you need wall shelves, but the fear of drilling into tiles holds you back.
Fortunately, home organization technology has evolved. You no longer need a plumber, a drill machine, or wall plugs to achieve a luxurious, hotel-like bathroom setup. Today, the secret to a beautifully organized bathroom lies in advanced, heavy-duty adhesive technology.
Quick Summary
- Ditch the Drill: Modern acrylic adhesive pads can hold up to 5kg of weight safely, making drilling completely unnecessary.
- Vertical Space is Key: Move everything off the floor and sink edges to instantly double your perceived bathroom space.
- Preparation is Everything: Adhesives only work on bone-dry, grease-free surfaces. Cleaning your tiles with rubbing alcohol before installation is the secret to longevity.
- The 24-Hour Rule: Never place your shampoo bottles on a newly installed shelf immediately. The adhesive needs 24 hours to cure and bond with the tile.
- Painless Removal: You can easily remove these organizers when moving out by applying heat with a standard hair dryer.
Why This Matters
Attempting to drill into bathroom tiles without professional tools usually results in hairline cracks or shattered tiles. Even if you succeed, you are left with permanent, ugly holes in your wall if you ever decide to change your bathroom layout.
For the millions of Indians living in rented homes or PGs, drilling is strictly prohibited by landlords. Without wall storage, you are forced to use flimsy plastic corner racks that stand on the floor. These floor racks accumulate hard water stains, trap hair, breed mold, and make it incredibly frustrating to sweep or mop the bathroom floor.
By utilizing no-drill wall organizers, you achieve three critical things: you protect your security deposit, you keep your personal hygiene items away from the splash zone of the bathroom floor, and you make daily cleaning significantly faster.
Common Problems People Face
When trying to organize a small bathroom, people typically run into the same frustrating roadblocks:
- The Midnight Crash: We have all experienced the terrifying sound of a cheap suction-cup shelf falling off the wall at 2 AM, sending shampoo bottles crashing into the bucket below.
- The Soap Mush: Leaving wet soap on a flat sink surface turns it into a soft, unusable paste that washes down the drain, wasting your money and creating a sticky mess.
- The Rust Trap: Buying cheap iron wire racks from local markets seems like a good idea until they start leaving permanent orange rust rings on your expensive floor tiles within a month.
- The Bottle Avalanche: Balancing face washes, conditioners, and body washes on a tiny window sill inevitably leads to them falling over like dominoes every time you reach for one.
Unknown Facts Most People Don't Know
Why do old-school suction cups fail while modern adhesive organizers stay put for years? The secret lies in microscopic science.
Bathroom tiles might look perfectly smooth to the naked eye, but under a microscope, they are filled with tiny pores and imperfections. Traditional rubber suction cups rely purely on a vacuum. Over time, temperature changes from hot showers cause the air to expand and contract, breaking the vacuum seal and causing the shelf to fall.
Modern organizers, however, use acrylic-based adhesive patch technology. This thick, jelly-like adhesive flows into the microscopic pores of the tile, creating a mechanical bond that completely seals out air and moisture. Furthermore, these adhesive patches distribute the weight of your bottles across a much larger surface area, allowing a single shelf to hold multiple heavy, 1-liter shampoo bottles without budging.
Step-by-Step Solution
Achieving a permanent, secure hold with no-drill organizers requires following a precise installation method. Here is the exact procedure to ensure your shelves never fall down:
Step 1: The Deep Clean (Crucial Step) Do not stick organizers onto tiles that have just been wiped with water. Bathroom tiles have invisible layers of soap scum, hard water residue, and skin oils. Wipe the exact area where you plan to stick the shelf with rubbing alcohol (surgical spirit) or white vinegar. Dry it completely with a clean microfiber cloth.
Step 2: Map Your Layout Before peeling off the sticker backings, hold the shelf against the wall to find the perfect height. Keep it high enough to avoid direct water spray, but low enough to reach comfortably. Use a pencil or dry-erase marker to draw a faint line indicating where the top of the adhesive should go.
Step 3: Apply the Adhesive Pad Peel off the protective film from the adhesive pad. Press it firmly against the tile, following your guideline. Now, use your thumbs to press from the center of the patch outwards to the edges. Your goal is to squeeze out every single air bubble trapped underneath.
Step 4: The 24-Hour Waiting Game This is where 90% of people make a mistake. Do not snap the metal shelf onto the adhesive hooks immediately. More importantly, do not put any weight on it. The acrylic adhesive needs 24 to 48 hours to fully cure and bond with the tile surface.
Step 5: Load and Organize Once 24 hours have passed, attach the shelf to the adhesive hooks. Place your heavier items (like large shampoo bottles) near the edges of the shelf where the structural support is strongest, and place lighter items in the center.
Recommended Products
To execute this renter-friendly makeover perfectly, you need the right gear. Here are the most effective, drill-free solutions available to transform your space:
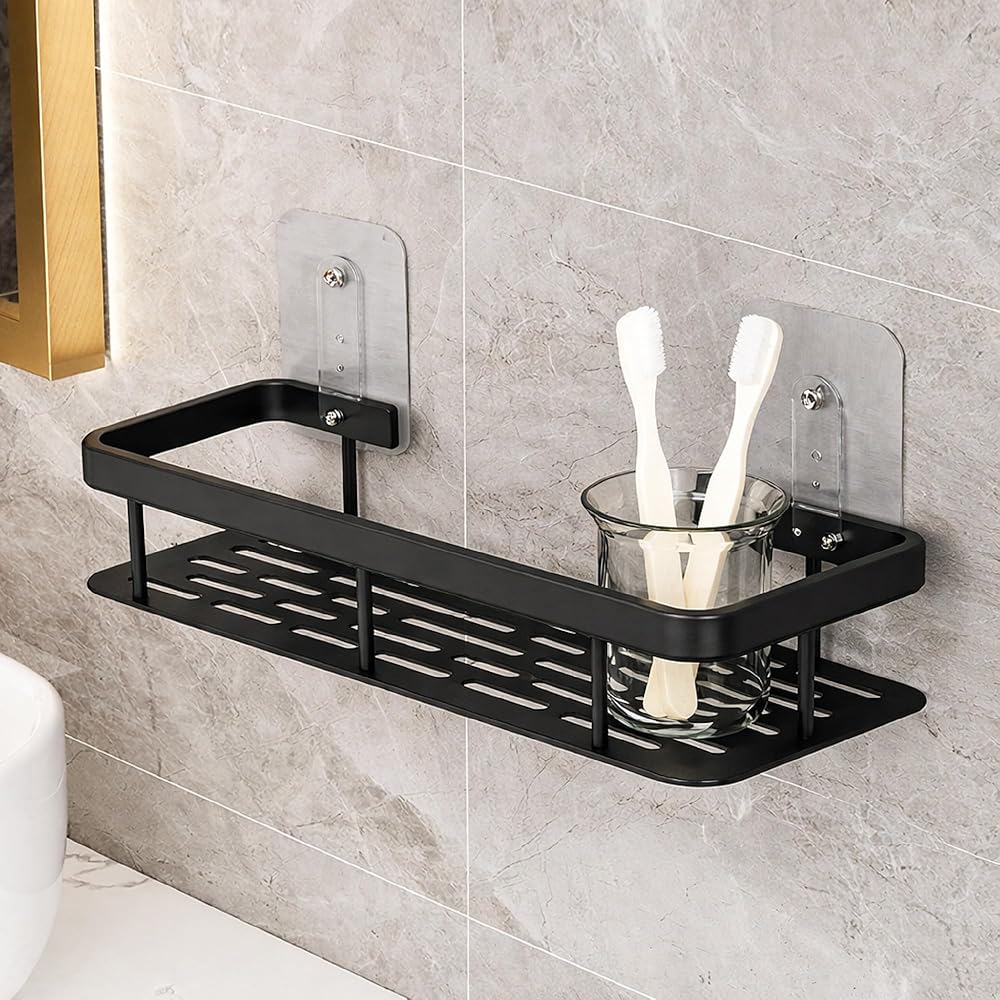
1. Wall Mounted Bathroom Storage Shelf Aluminium Wall Rack
- Why it works: Unlike iron, space-grade aluminium is naturally rust-proof, making it perfect for the humid Indian bathroom environment. It features wide drainage slots at the bottom so water never pools around your bottles, preventing slimy mold buildup.
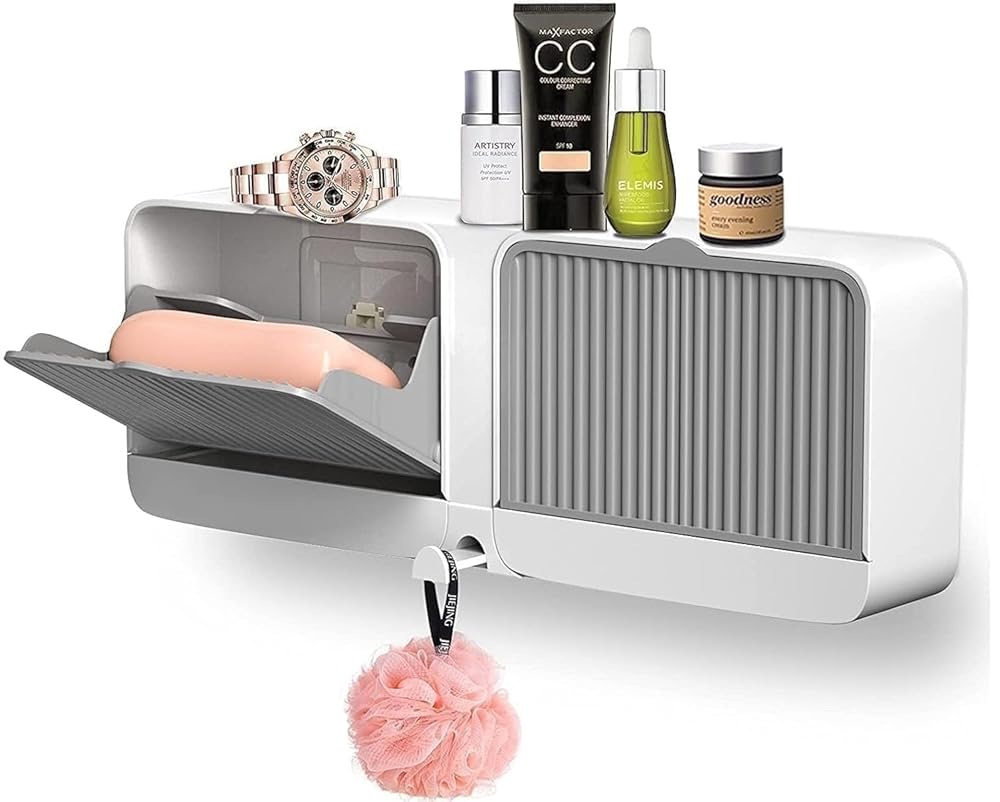
2. Wall Mounted Soap Holder with Lid and Drain Tray
- Why it works: This double-compartment soap box is a game-changer. The integrated lid protects your premium bathing bars from the shower spray, while the bottom drain tray catches excess water instead of letting it drip onto your sink.
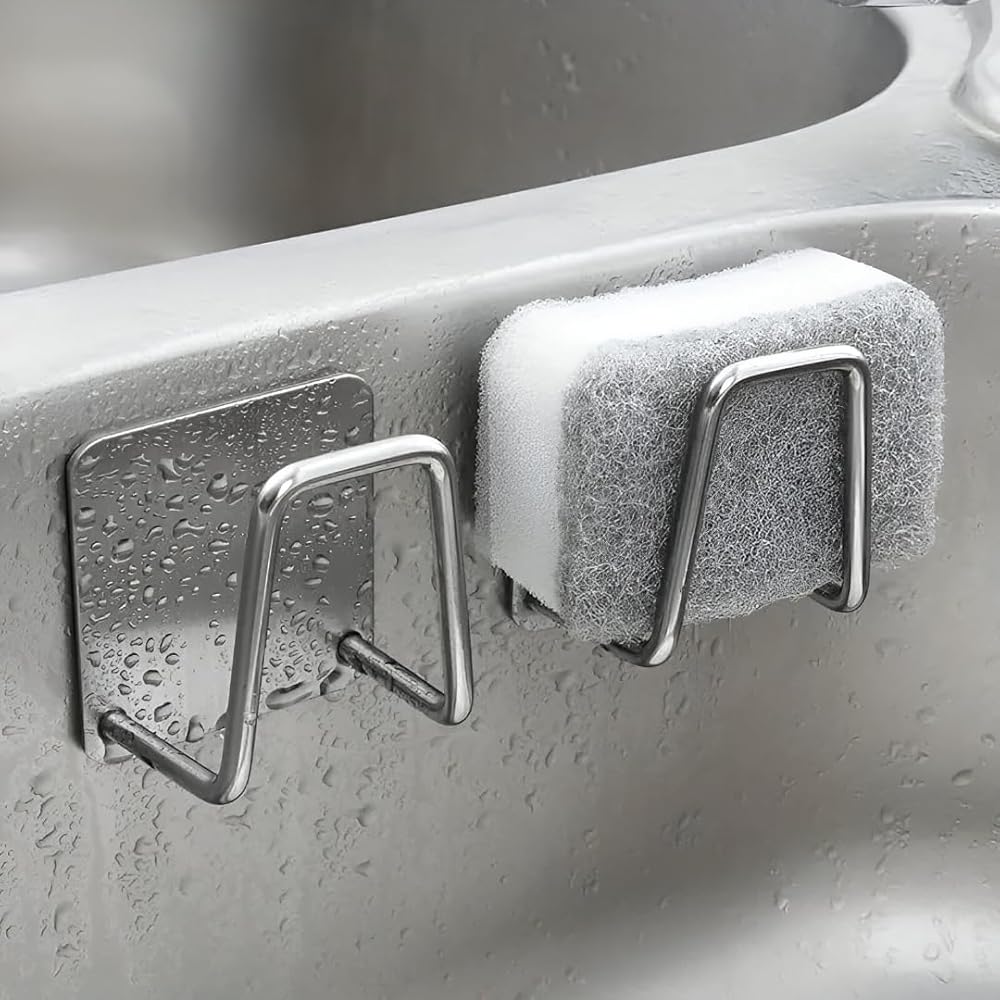
3. Adhesive Wall Mounted Hook Holder Stainless Steel Sponge Holder
- Why it works: A minimal, highly effective solution. Stick these next to your washbasin or inside the shower area to hang your loofahs, back brushes, or cleaning sponges so they can drip-dry properly.
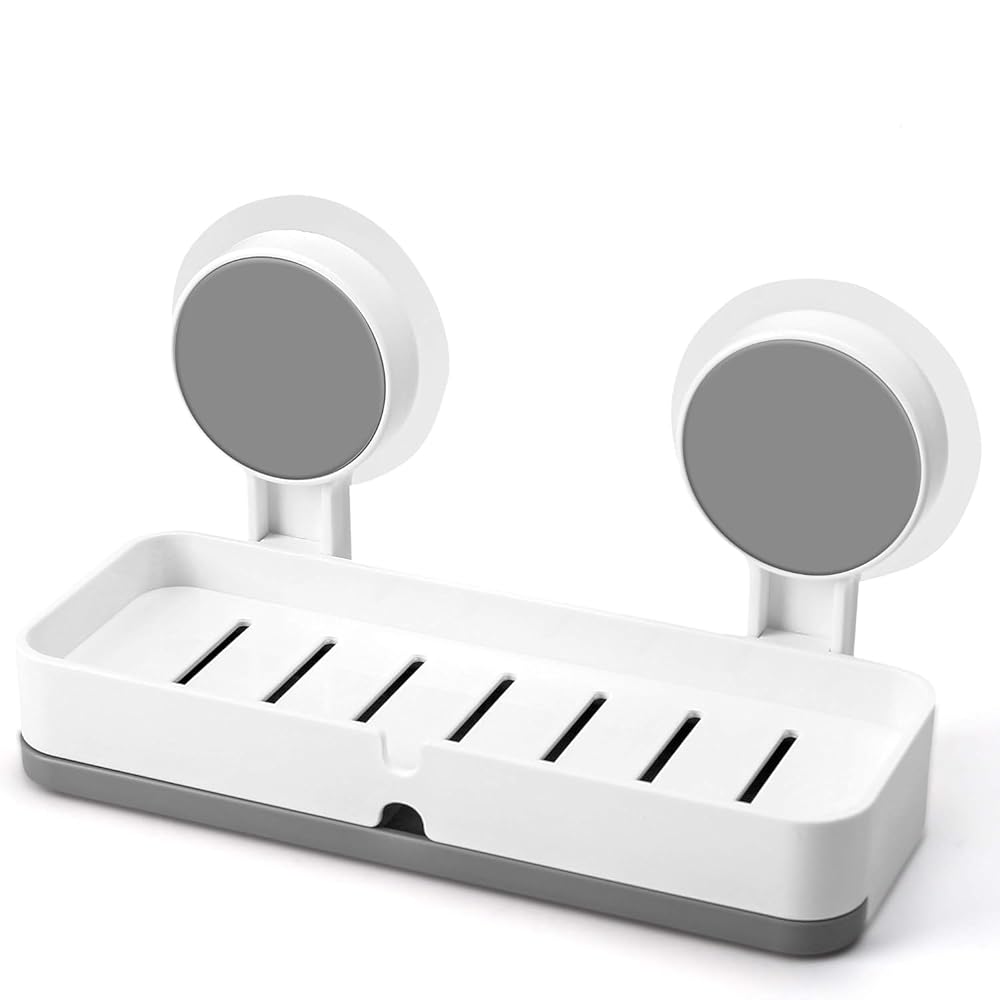
4. Wall Mounted Soap Holder | No Drill Self Adhesive Soap Dish
- Why it works: A sleek, plastic alternative featuring a beautiful white and grey aesthetic. The strong suction-adhesive hybrid pad holds firm, and the minimalist drain tray keeps your sink area looking spotless.
Who Should Buy
- Tenants and Renters: Anyone who will face penalties for drilling holes in the walls.
- Hostel & PG Residents: Students or professionals who need to maximize storage in shared, cramped bathrooms.
- New Homeowners: Those who have invested in expensive, large-format ceramic tiles and refuse to risk cracking them with a drill.
- Busy Individuals: People looking to upgrade their bathroom aesthetic in 10 minutes without waiting around for a local handyman.
Who Should Skip
- People with Highly Textured Walls: Adhesive pads need a flat, relatively smooth surface to bond. They will not work on rough stone walls, exposed brick, or 3D textured feature tiles.
- Homes with Distemper Painted Walls: If your bathroom walls are painted rather than tiled, the adhesive will bond to the paint. When the shelf gets heavy, it will simply rip the layer of paint right off the wall.
- Wallpapered Bathrooms: The moisture combined with the weight will tear the wallpaper.
Common Buying Mistakes
- Buying the "Push-and-Lock" Suction Cups: They look convenient but inevitably fail in fluctuating temperatures. Always opt for the flat, peel-and-stick acrylic adhesive patches.
- Ignoring Grout Lines: Never stick an adhesive pad directly over the line where two tiles meet (the grout line). Air will enter through the grout channel, and the shelf will eventually fall. Always center the adhesive pad squarely in the middle of a single tile.
- Buying Closed-Bottom Bins: Avoid buying storage cups or shelves that do not have drainage holes at the bottom. They will fill with shower water and become a breeding ground for mosquito larvae and bacteria.
Expert Tips
The Hairdryer Removal Hack: The biggest worry renters have is whether the heavy-duty adhesive will leave a permanent sticky mess when they move out. The solution is simple thermodynamics. When it is time to move, plug in a standard hairdryer and blast hot air directly onto the adhesive patch for 3 to 5 minutes. The heat softens the acrylic polymer, allowing you to easily peel the patch off the tile in one clean piece, leaving zero residue behind.
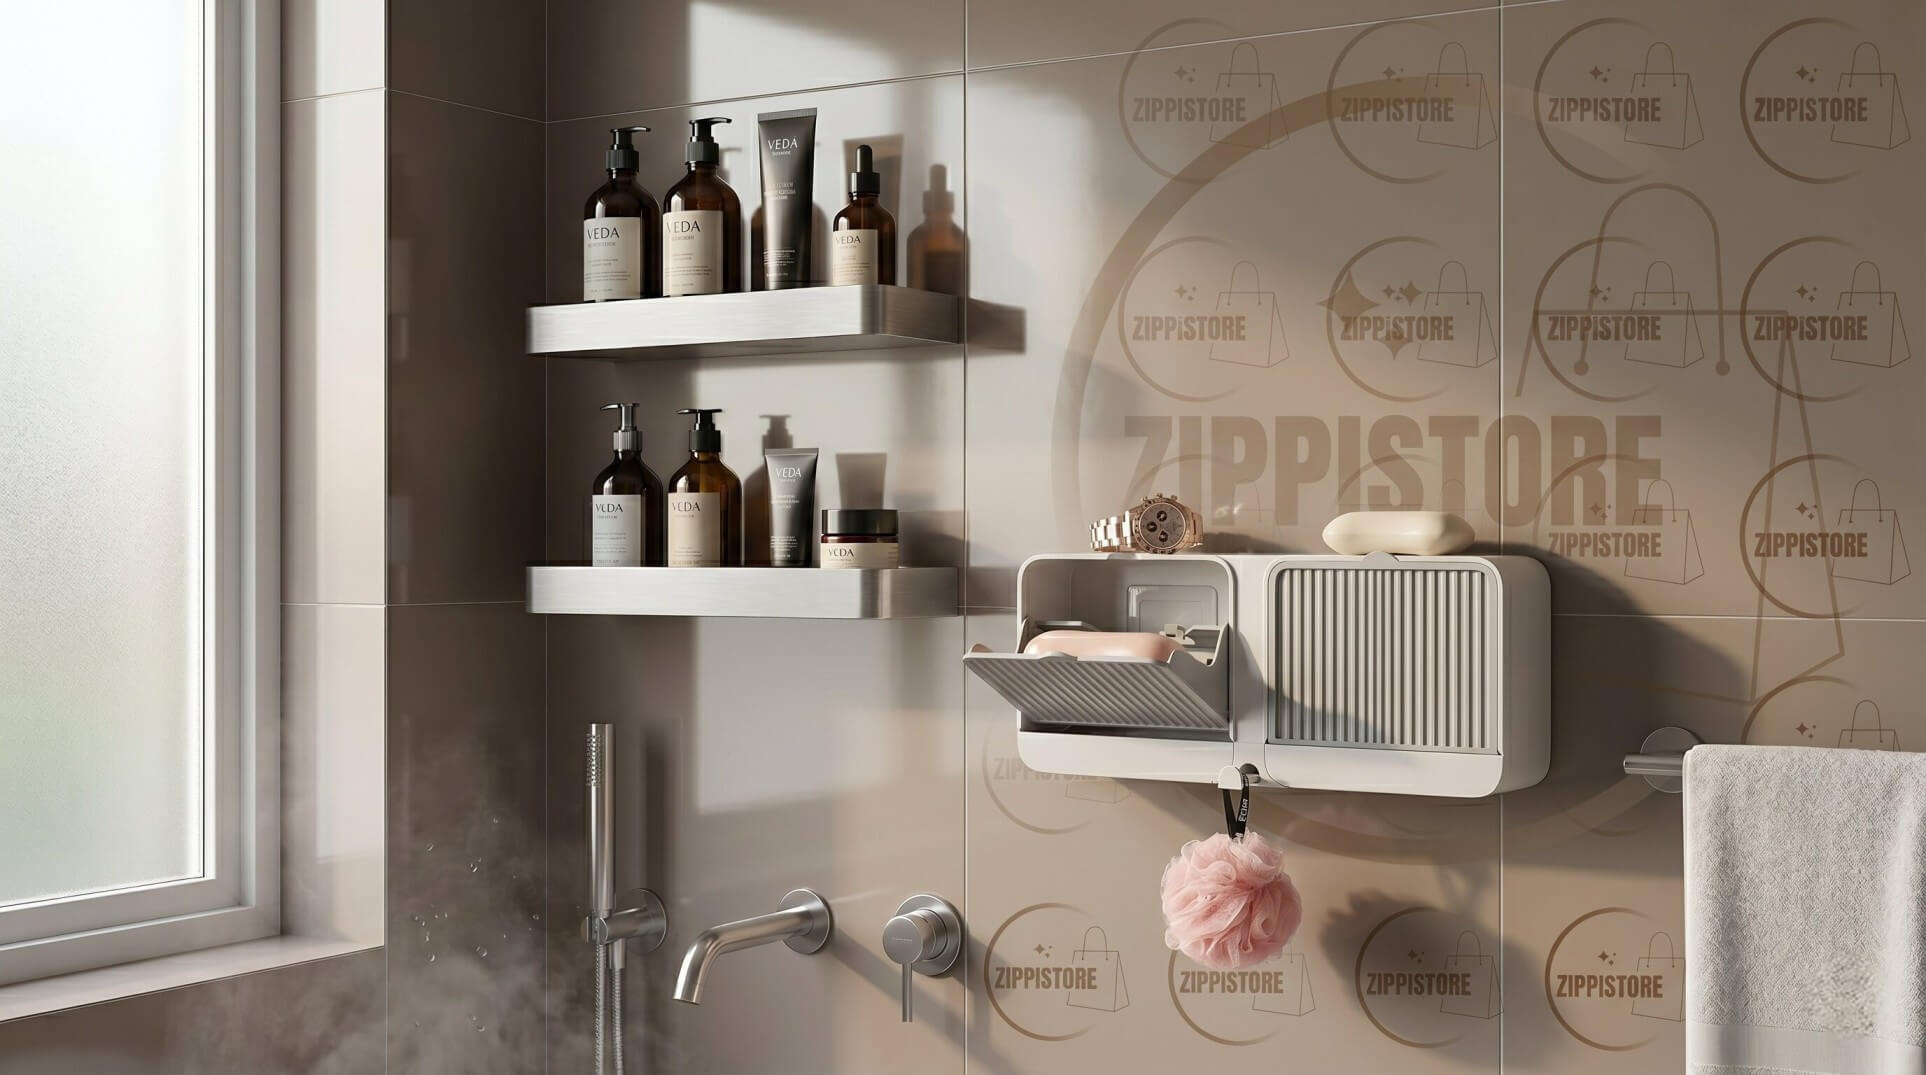
Combine with Floor Cleaning Efficiency: Once you have moved all your bottles, soaps, and brushes onto the walls using these organizers, your floor is completely clear. This is the perfect time to upgrade your cleaning routine. Without having to move bottles around, you can effortlessly use the ZippiStore 3 in 1 Floor Cleaning Brush with Wiper to scrub away hard water stains and instantly wipe the floor dry, ensuring a hygienic, anti-slip bathroom in minutes.
Real-Life Example
Karan, an IT professional, recently moved into a compact 1BHK apartment in Pune. The bathroom had beautiful new tiles but exactly zero shelves. For the first two weeks, his expensive beard washes, shampoos, and face scrubs sat directly on the bathroom floor. Every time he showered, they got splashed with dirty water.
His landlord explicitly threatened to deduct ₹5,000 from his security deposit if he saw any drill holes. Karan ordered two Aluminium Wall Racks and a Double Compartment Soap Holder. Following the 24-hour waiting rule, he installed them right above his waistline, far away from the shower's direct splash zone.
In just 15 minutes of actual "work", he transformed the bathroom from a cluttered, unhygienic mess into a highly functional space. His bottles were clean, his soap stopped melting away, and because the floor was completely clear, the bathroom dried twice as fast after a shower.
Related Topics Readers May Like
- How to Clean Bathroom Floor Tiles Easily Without Bending
- 5 Ways to Remove Hard Water Stains From Bathroom Fixtures
- The Best Space-Saving Organization Hacks for Small Kitchens
- How to Wash Delicate Items in a Washing Machine Safely
Final Takeaway
You do not need to compromise on aesthetics or functionality just because you cannot use a drill. By understanding how modern adhesive technology works, properly preparing your tile surfaces, and choosing rust-proof, smart-draining products, you can build a customized, heavy-duty storage system in any bathroom.
Key Action Items
- Measure the empty wall space in your bathroom to determine how many shelves you need.
- Order your preferred no-drill aluminium racks and soap holders.
- Clean your designated bathroom tiles thoroughly with rubbing alcohol and let them dry.
- Install the adhesive pads carefully, avoiding the tile grout lines.
- Wait a strict 24 hours before placing your toiletries onto the newly installed shelves.
Frequently Asked Questions
Featured Products
Discover the top-rated items mentioned in this article.
Wall Mounted Soap Holder | No Drill Self Adhesive Soap Dish | Strong Suction Bathroom Organizer | Kitchen Sponge Holder with Drain Tray | Plastic Soap Case (White & Grey)
Wall Mounted Soap Holder with Lid and Drain Tray, Double Compartment Soap Box with Adhesive Sticker Installation, Bathroom Soap Storage Case with Hanging Hook
Adhesive Wall Mounted Hook Holder Stainless Steel Sponge Holder Rack for Kitchen Sink Bathroom Wall (2 Pcs)